Discover the simplest and most effective party setup for completing Honour Mode difficulty in Baldur’s Gate 3 as we walk you through builds, classes, gear, items, and more.

Honor Mode officially arrived as part of Patch 5, introducing a new difficulty setting. This mode offers a formidable challenge for players looking to test their combat skills and adaptability. Unlike Tactician mode, Honour Mode imposes a single-save constraint, meaning a total party wipeout ends your campaign. Various factors in Honour Mode:
- Single Save – you cannot save scum (reload), and with autosaves, there is no alt+F4 to close out the game when you make a bad decision.
- Party Permadeath – the campaign ends, or you can continue at a lower difficulty.
- Legendary Actions for Bosses – powerful new actions make boss fights extra difficult.
- Rewards – gain a new golden dice in any new playthrough and Foehammer achievement.
- Rules – Similar to Tactican rules with higher difficulty on bosses and double supplies for long rest (80 to replenish resources).
If you’re looking for a detailed guide on setting up a party for the hardest achievement in Baldur’s Gate 3, Honour Mode (Foehammer), this is your guide. The below party composition and setup focuses on pure combat performance but also blending in simplistic. You won’t have nearly the same level of dialogue utility as other party setups, but ease of play, combat power, and performance will be emphasized.
Best Party Setup – Honour Mode Baldur’s Gate 3

The best party composition setup for an honor mode campaign is simple and powerful in that you, the player, can execute it. Moreover, many builds are narrowly focused and only work with a specific combination of gear that won’t work if missed in early acts, won’t work. We will avoid the complex niche builds and focus on simplistic and powerful ones that work throughout the game and aren’t gear-dependent.
Additionally, spellcasters are more challenging to use in Honour Mode. Your long rest cost is increased to 80, requiring frequent rest and materials to optimize power. Therefore, we forgo the Paladin class for the Fighter class, which is nearly as powerful, though it doesn’t require constant long rest. Here are the suggested roles and party setup composition for an easy Honour Mode campaign.
- Range Damage Dealer – Rangers are the best ranged damage dealers due to their high dexterity and health. Moreover, Rangers can access spellcasting and use powerful scrolls, arrows, ammunition, and lockpick as effectively as a Rogue. Therefore, they are a more powerful combatant than a Rogue, and playing at range gives them extra safety.
- Front-Line Greatsword – the most simple and easy-to-use Strength melee build is the Fighter. Fighters do not require multiclass to be powerful, with improved extra attacks, and can attack 14 times in one turn once optimized.
- Healer and Support – Cleric is the obvious choice for support and healer. They can access heavy armor, shield proficiency, and swap in spells effortlessly while also doing good damage.
- Spellcaster Area Damage – Sorcerers are the most powerful spellcasters because of Metamagic, allowing them to attack twice in one turn. Wizards have more utility and some survivability, but Sorcs can burn down the entire battlefield on turn one.
Companions

While Companions are mainly for story purposes, some side quests result in additional gear and are worth advancing questlines specifically for this reason. Here are our suggested companions and their usage in an Honour Mode Campaign:
- Karlach – She is an excellent front-line fighter due to her unique soul coin bonus. Once consumed, she gains 1d4 fire damage when raging (Barbarin) or when HP drops below 25%. Moreover, Tieflings gain fire resistance, dark vision, and a free smite spell.
- Lae’zel – she makes the best range build paired with Gloom Stalker Ranger. The only downside to Githyanki is the lack of Darkvision, but Gloom Stalker gets Superior Darkvision, covering up the weakness. Moreover, Lae’zel can also make a great front-line fighter with a free Misty Step for mobility and bonuses to Githyanki Weapons.
- Shadowheart – the default Cleric, she’s a fan favorite and a decent choice. However, High High-Elf isn’t that good of a racial bonus for a class that already has armour and shield proficiency. But, you must recruit her and progress her story for a powerful permanent bonus and shield in Act 3.
- Astarion – he is one of the weaker characters until Act 3, where you can Ascend him and gain unique bonuses. Moreover, he has additional quests and is a good choice to bring along.
- Wyll – he makes a good spellcaster because humans gain shield proficiency, and spellcasters can combine quarterstaff and shield immediately. Moreover, Wyll has a powerful weapon quest at the end of Act 2, so you should recruit him.
- Gale – a human and similar to Wyll, but he doesn’t have any unique gear-related quests or power-ups.
Overall, for optimal honour mode party setup, you should use Karlach or Lae’zel for a Fighter, Wyll or Gale for a spellcaster, Lae’zel or Asterion for Ranger, and Shadowheart for Cleric.
Ranger

Best Honour Mode Ranger Features in Baldur’s Gate 3:
- Classes – 5 Ranger, 4 Rogue, 3 Fighter
- Subclasses – Gloom Stalker, Thief, Champion
- Armor – Medium
- Weapons – Longbow
- Background – Urchin
- Race – Wood Elf
- Ability Score
- Strength – 8
- Dexterity – 17 (+1 Auntie Ethel)
- Constitution – 16
- Intelligence – 8
- Wisdom – 14
- Charisma – 10
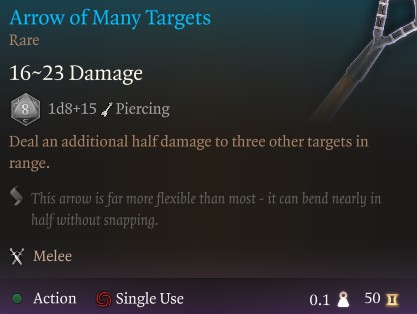
The Ranger class is your long-range single-target killer. Expect a slow start with the Ranger until level 5, where you unlock Extra Attack. This allows you to attack twice with one action. Moreover, around level 8 you will start to see arrow of many targets. Start buying and trading for as many arrows as possible, including elemental arrows (undead, fiend, dragon, etc). These arrows will carry your damage against the hardest bosses in the game.
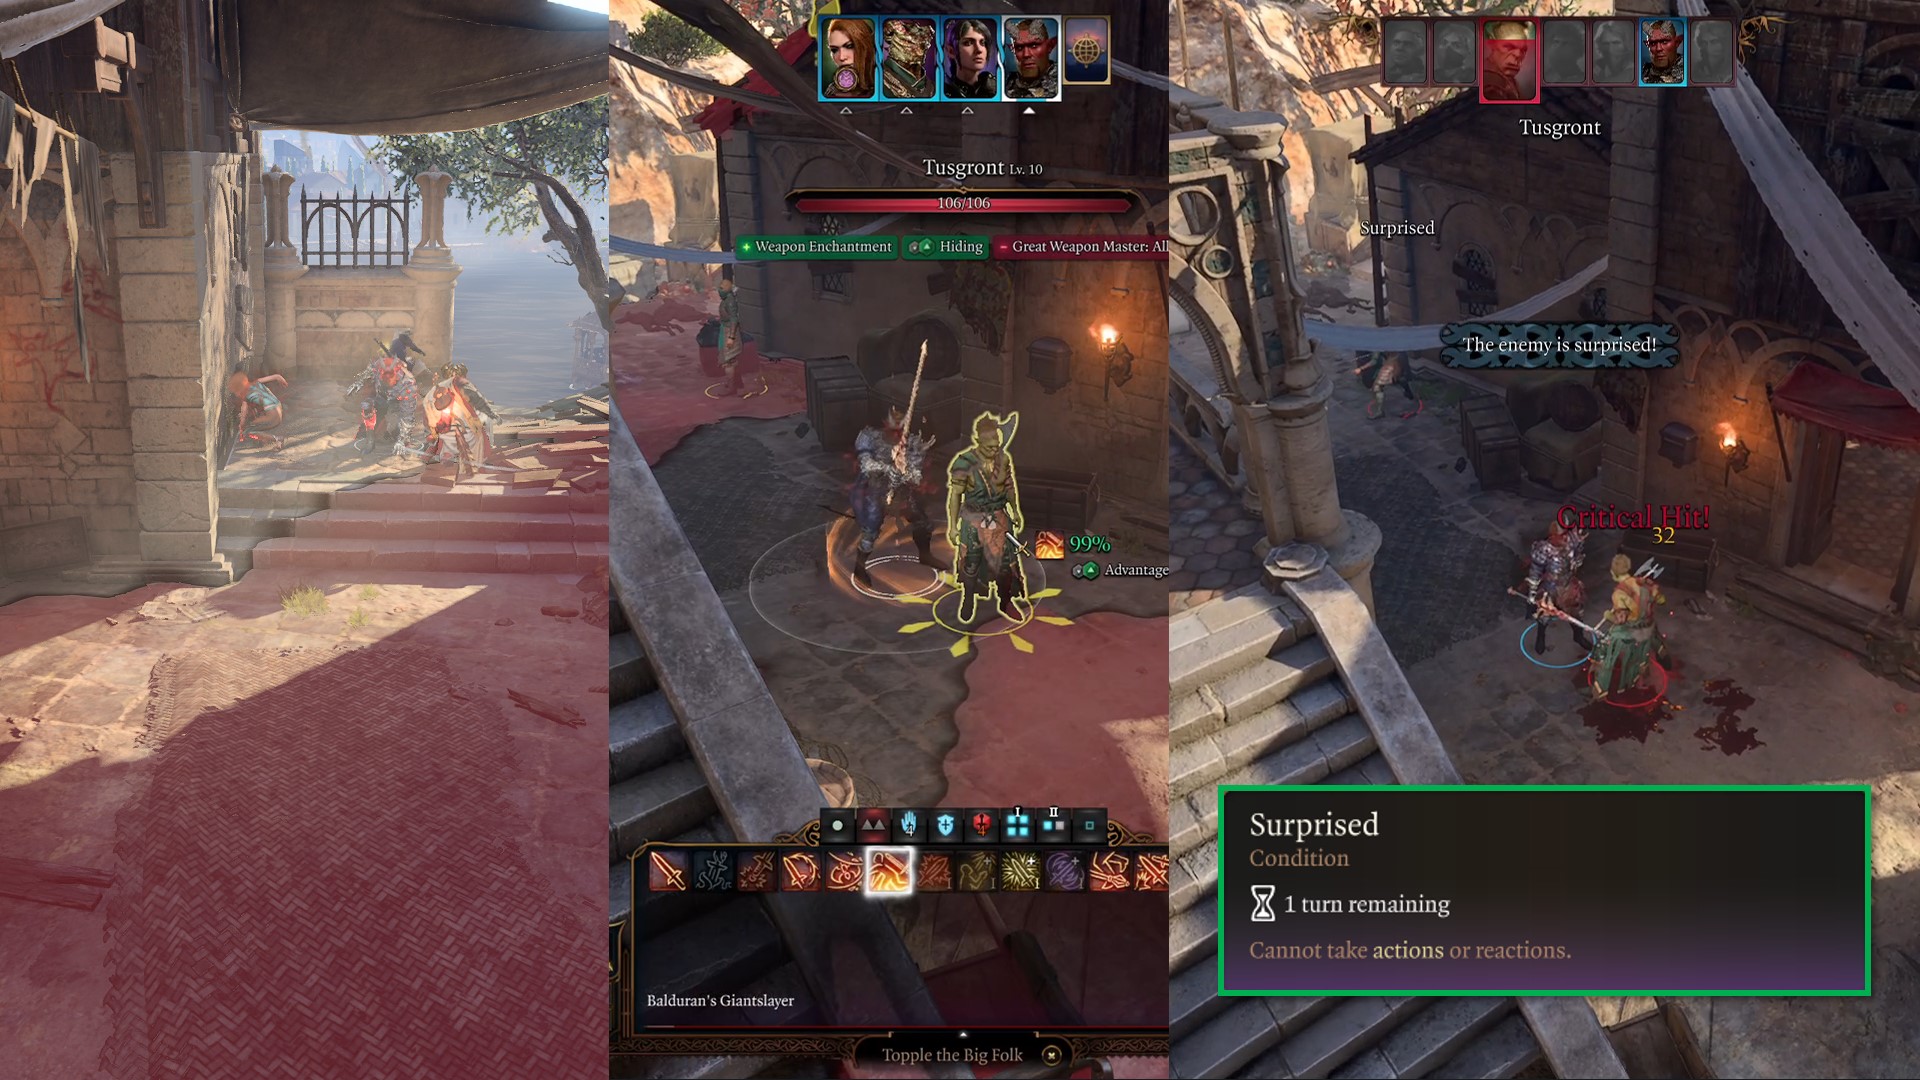
Using the Gloom Stalker Ranger multiclass build, you want to sneak and attack from stealth to trigger surprise and gain an extra turn. Pre-buff by putting oil of combustion or oil of accuracy on your weapon. Also, use the Elixir of Bloodlust, Elixir of Heroism, or Elixir of Viciousness after each long rest. Once buffed, attack from stealth at the highest damage-dealing enemy or one that can crowd-control targets. Next, use Hunter’s Mark and attack again, hopefully killing a target. If you have the elixir of bloodlust, you should get a second action. Do the same, Hunter’s Mark, attack a target.
Keep a potion of speed and invisibility on you at all times. Potion of Speed you want to use in an “oh crap” moment where you are likely to party wipe without another action. Invisibility is used when the fight is lost and you must flee combat.
- Suggested Companions – Lae’zel or Astarion
- Alternative Classes: Bard (dual handcross bows), Rogue (dual handcross bows)
Also Check:- BG3 Interactive Map
Honour Mode Ranger Build Summary
Act 1 Gear
- Chest – Graceful Cloth
- Gloves – Gloves of Archery
- Boots – Boots of Striding
- Ring – Caustic Band
- Weapon – Titanstring Bow
- Secondary – Club of Hill Giant Strength
- Off-hand – Wood Woad Shield
Act 3 Gear
- Chest – Armour of Agility
- Gloves – Legacy of the Masters
- Boots – Helldusk Boots
- Ring – Killer’s Sweetheart
- Weapon – Gontr Mael
Level Progression
- Level 1 – Bounty Hunter, Cold Resist
- Level 2 – Longstrider, Hunter’s Mark
- Level 3 – Gloom Stalker Subclass
- Level 4 – Sharpshooter feat
- Level 5 – Extra Attack
- Level 6 – Multiclass to Rogue
- Level 7 – Sneak Attack
- Level 8 – Fast Hands
- Level 9 – +2 Dexterity
- Level 10 – Multiclass to Fighter
- Level 11 – Action Surge
- Level 12 – Champion Subclass
Fighter
Best Honour Mode Fighter Features in Baldur’s Gate 3:
- Class – Fighter
- Subclass – Battle Master
- Armor – Heavy
- Weapon – Greatsword
- Background – Soldier
- Race – Half-Orc
- Abilities Score
- Strength – 16
- Dexterity – 14
- Constitution – 16
- Intelligence – 8
- Wisdom – 10
- Charisma – 10
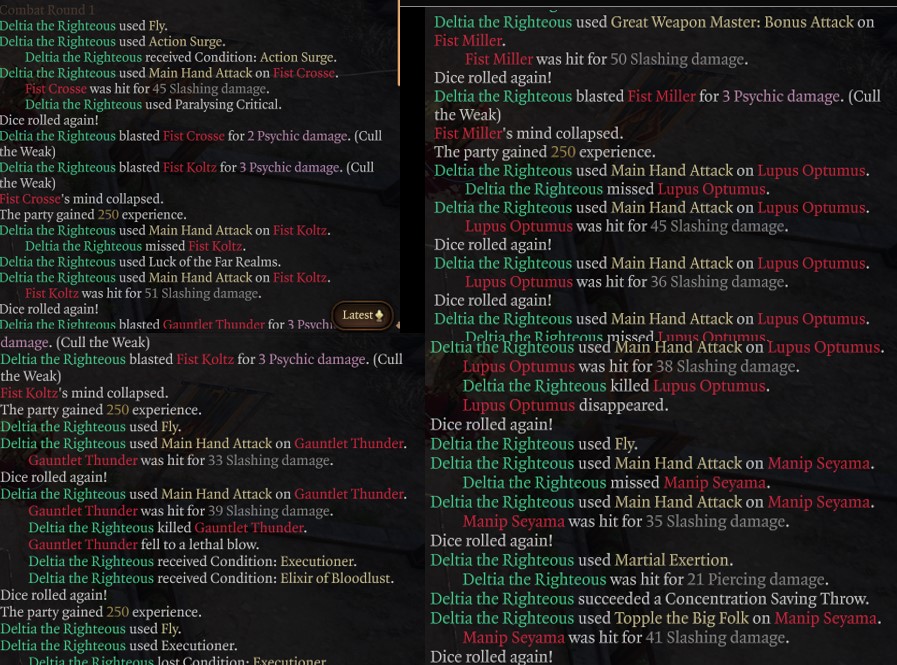
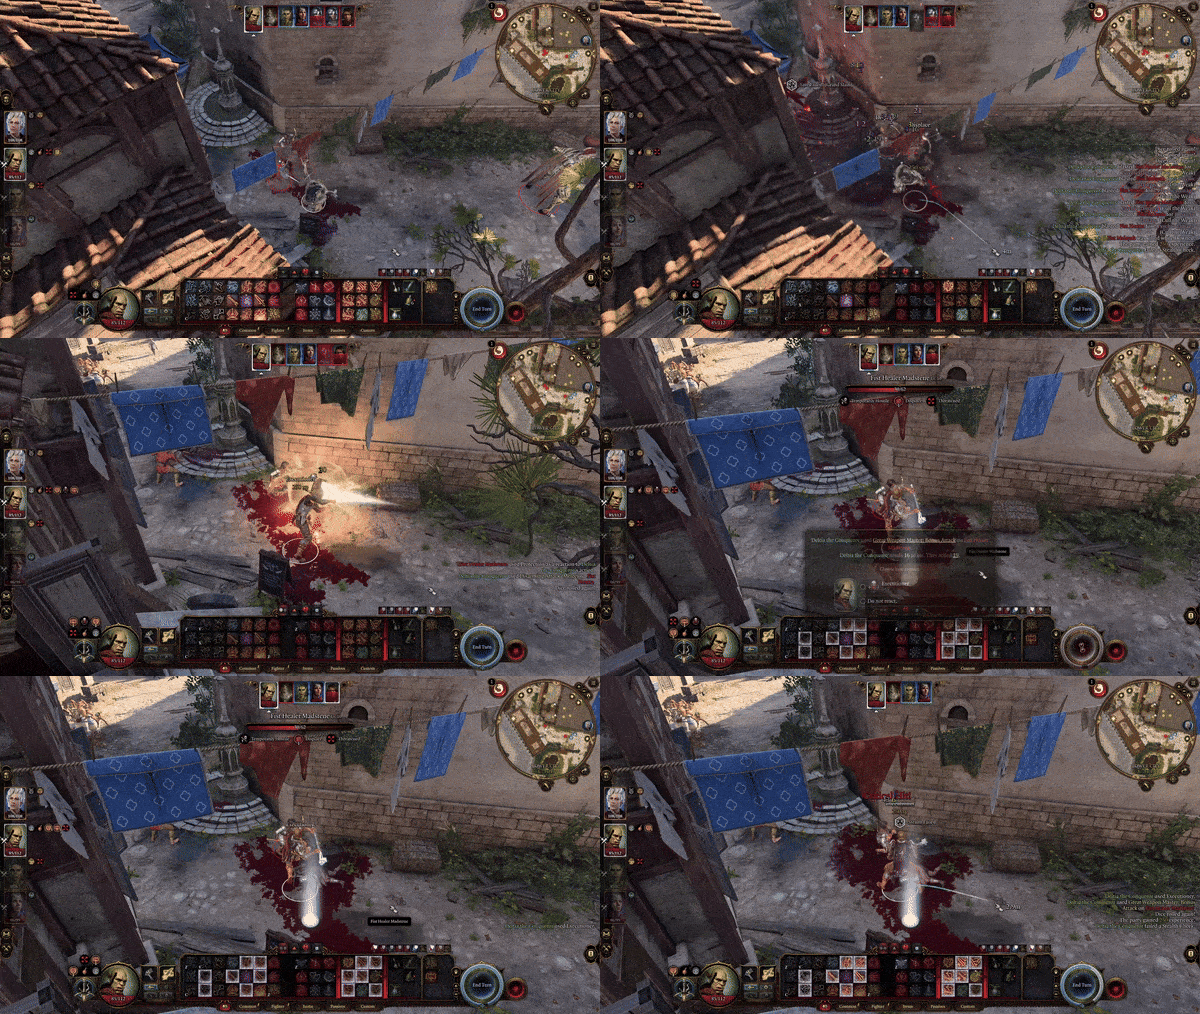
The Fighter is the ultra-simple melee damage dealer who isn’t overly complex but has incredible damage. What makes the Fighter class strong is Extra Attack and Improved Extra Attack. You don’t want to multiclass, so you can do three attacks with one action at level 11. The only two downsides to Fighter are lack of mobility and spellcasting. To bypass the lack of mobility, use Lae’zel’s companion, Haste Helm, and Amulet of Misty Step in Act 1. Moreover, you want to select this as your playable character and take the tadpole to gain fly at higher levels. This covers up for the weak mobility, and you don’t have the complexity of the Paladin or the reliance on Rage from the Barbarian.

Use Elixir of Hill Giant Strength to boost you to 21 and Great Weapon Master feat at level 4. Turn one is the most critical, and you want to have your Ranger buff your movement speed with Longstrider (pre-fight no spell cost). With Haste Helm and Longstrider, you have insane per-turn potential. Attack the weakest target or a spellcaster and blast through their HP. Save your bonus action for a Great Weapon Master proc or a speed potion. Also, use your Action Surge only when you are likely to kill a target or desperately need an action. Act 2 has a special permanent bonus to gain +2 strength so make sure to get it to save you a feat.
- Suggested Companions: Karlach or Lae’zel
- Alternative classes: Barbarian, Paladin
Honour Mode Fighter Build Summary
Act 1 Gear
- Chest – Adamantine Splint Armour
- Gloves – Gloves of the Growling Underdog
- Boots – Disintegrating Night Walkers
- Ring – Crusher’s Ring
- Weapon – Sword of Justice
- Off-hand – Hunter’s Shortbow
Act 3 Gear
- Chest – Helldusk Armour
- Gloves – Legacy of the Masters
- Boots – Disintegrating Night Walkers
- Ring – Ring Of Regeneration
- Weapon – Balduran’s Giantslayer
- Range – Fabricated Arbalest
Level Progression
- Level 1 – Great Weapon Fighting
- Level 2 – Action Surge
- Level 3 – Battle Master Subclass
- Riposte
- Precision Attack
- Disarming Attack
- Level 4 – Great Weapon Master Feat
- Level 5 – Extra Attack
- Level 6 – +2 Strength feat
- Level 7 – Push, Trip Attack
- Level 8 – +2 Strength Feat
- Level 9 – Indomitable
- Level 10 – Sweeping Attack
- Level 11 – Improved Extra Attack
- Level 12 – Savage Attacker Feat
Cleric

Best Honour Mode Cleric Features in Baldur’s Gate 3:
- Subclass – Life Domain
- Armor – Heavy
- Weapons – One Hand & Shield
- Background – Folk Hero
- Race – Wood Elf
- Background – Folk Hero
- Ability Score
- Strength – 8
- Dexterity – 14
- Constitution – 16
- Intelligence – 10
- Wisdom – 16
- Charisma – 10
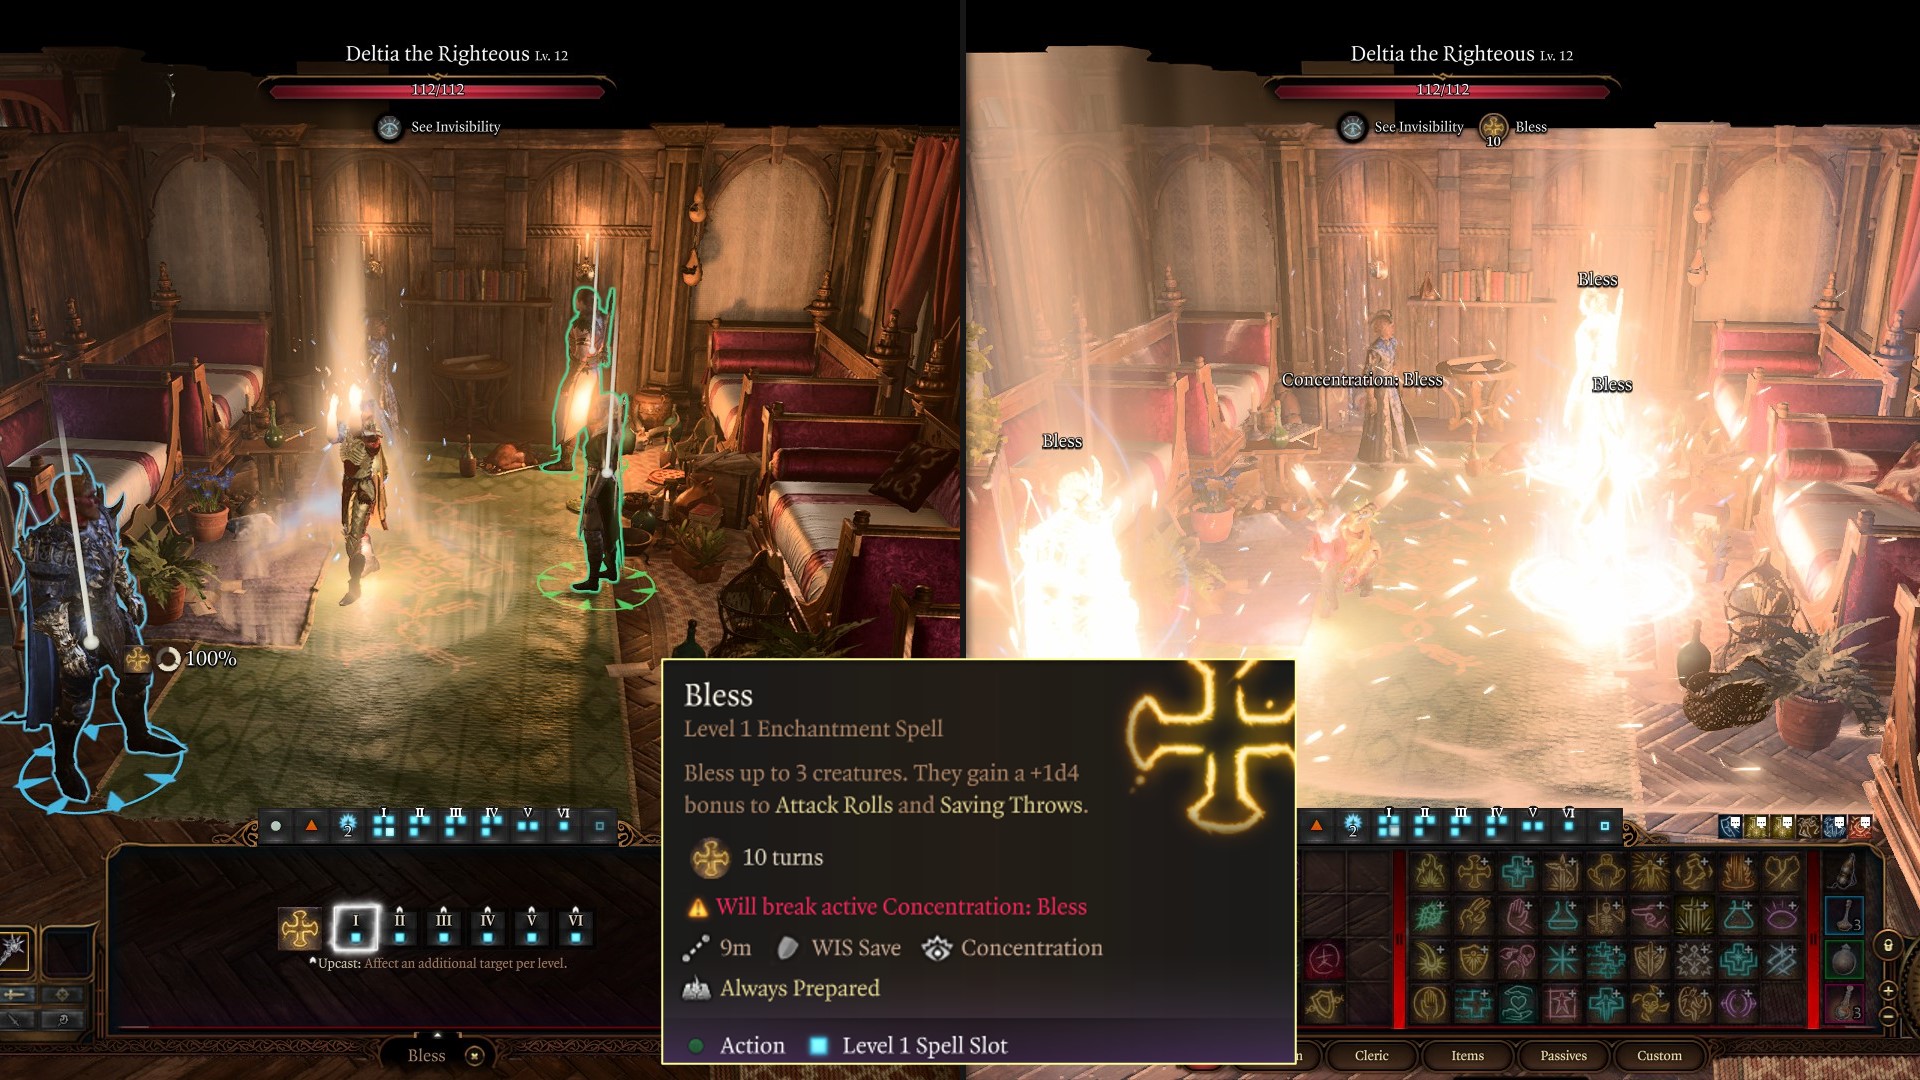
The Life Cleric makes the best supporting character in Baldur’s Gate 3. You want to use your Life Cleric to pre-buff with Bless, Aid, Freedom of Movement and other skills. Moreover, take the Sanctuary spell early. You can cast this on someone near death and NPC will avoid attacking them directly until they attack. This is helpful when someone is about to die, or you suspect the NPC will target them. If you select Shadowheart, you need to respec to Life Cleric because the Preserve Life channel divinity heal is so powerful.
Additionally, use your Cleric as a crowd-control character as well. Command and Banishment are your best crowd control spells, and Command can drop weapons on melee or ranged damage dealers. You can then pick up the weapon and neutralize one enemy or even the boss. Banishment is great for relieving pressure from a high-damage dealer enemy for two turns.
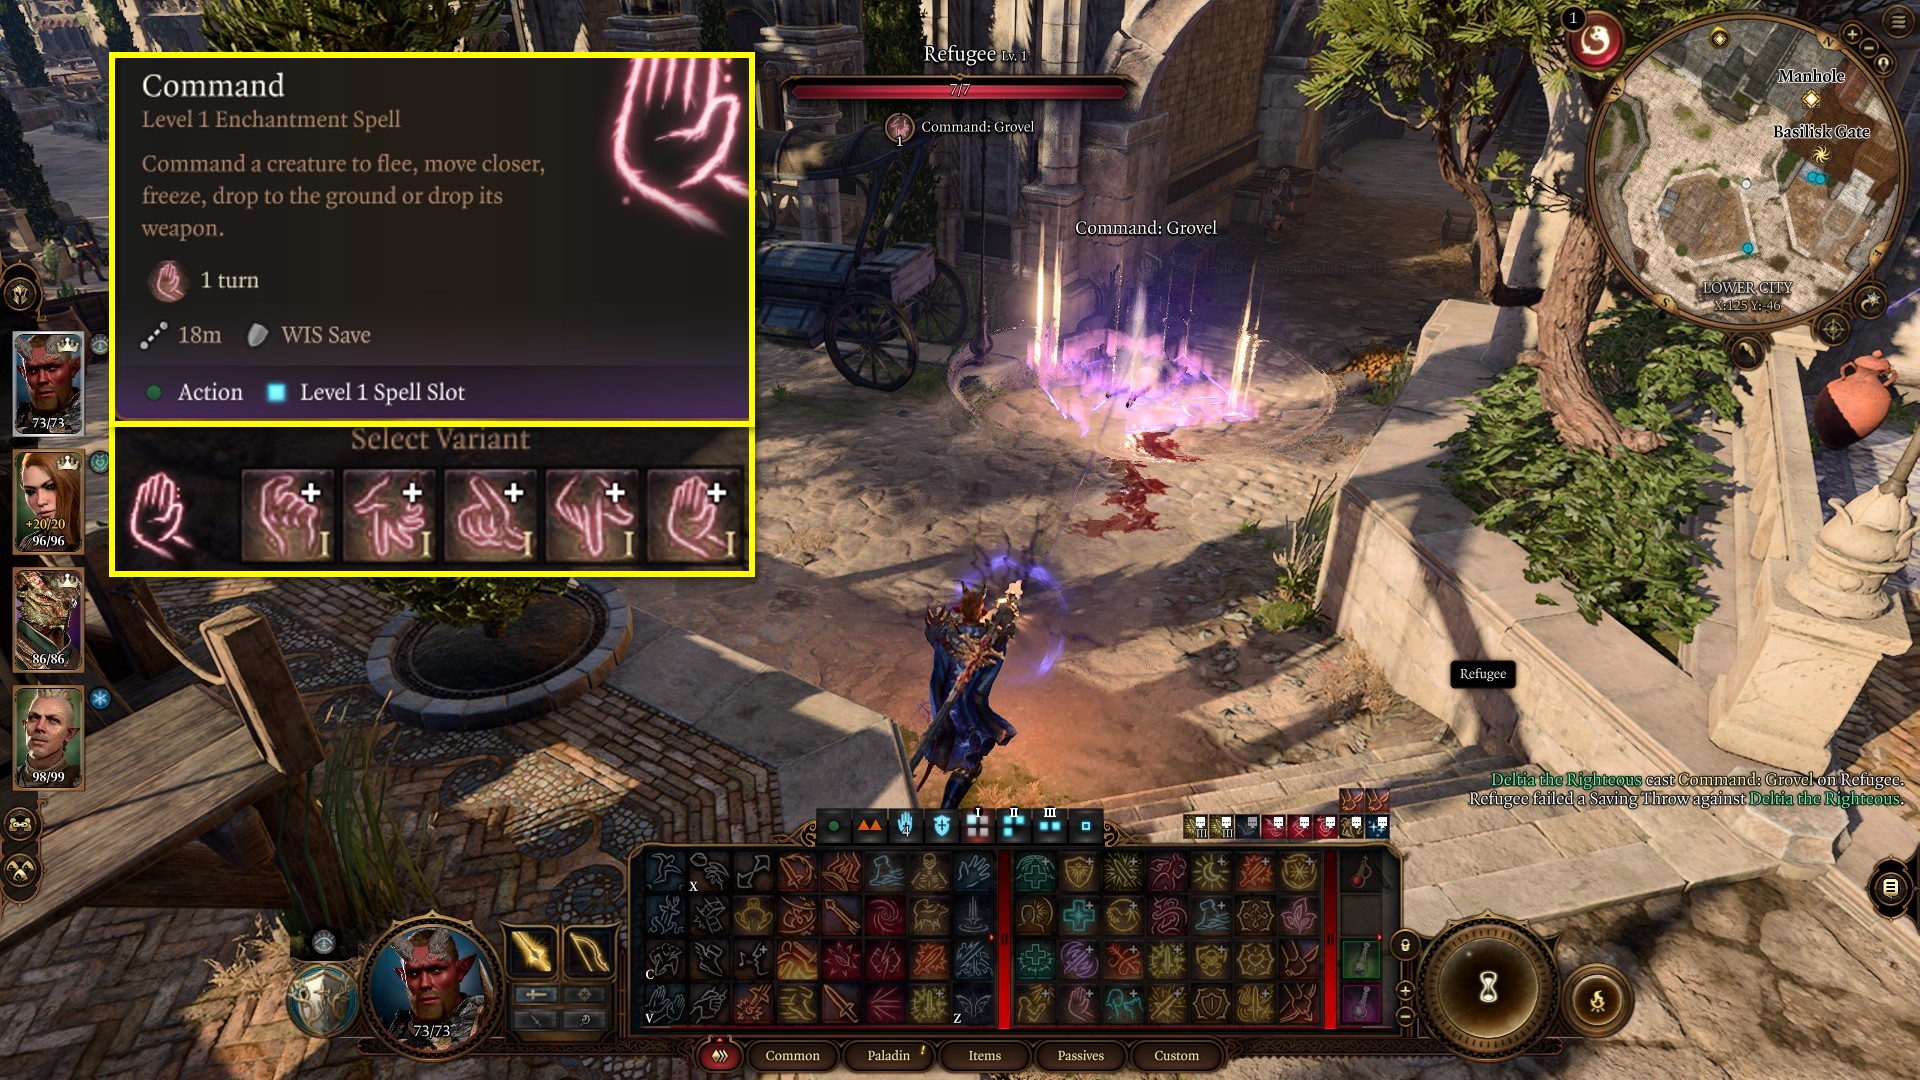
Your first turn is usually spent casting Bless (if you didn’t pre-buff) or Crowd Control with an action. Your bonus action is used for Sanctuary or Spiritual Weapon. On turn two, usually, you need to heal or crowd control. Use Mass Healing Wound and Mass Cure Wound combo for big healing or Command for CC.
- Suggested Companions: Shadowheart or Gale
- Alternative classes: Bard, Druid
Honour Mode Cleric Build Summary
Act 1 Gear
- Chest – Luminous Armour
- Gloves – Hellrider’s Pride
- Boots – Boots of Speed
- Ring – The Whispering Promise
- Weapon – Staff of Arcane Blessing
- Off-hand – Glowing Shield
- Range – Bow of Awareness
Act 3 Gear
- Chest – Armour of Persistence
- Gloves – The Reviving Hands
- Boots – Boots of Persistence
- Necklace – Amulet of Greater Health
- Weapon – The Blood of Lathander
- Off-hand – Viconia’s Walking Fortress
- Range – Hellrider Longbow
Level Progression
- Level 1 – Guiding Bolt, Sanctuary
- Level 2 – Command
- Level 3 – Spiritual Weapon
- Level 4 – Feat +2 Wisdom
- Level 5 – Mass Healing Word Spell
- Level 6 – Glyph of Warding Spell
- Level 7 – Banishment
- Level 8 – War Caster Feat
- Level 9 – Flame Strike Spell
- Level 10 – Planar Binding Spell
- Level 11 – Planar Ally
- Level 12 – Feat +2 Wisdom
Sorcerer

Best Honour Mode Sorcerer Features in Baldur’s Gate 3:
- Class – Sorcerer
- Subclass – Draconic Bloodline
- Armor – Cloth
- Weapons – Quarterstaff and Shield
- Background – Charlatan
- Race – High Half-Elf
- Ability Score
- Strength – 8
- Dexterity – 16
- Constitution – 14
- Intelligence – 10
- Wisdom – 10
- Charisma -16
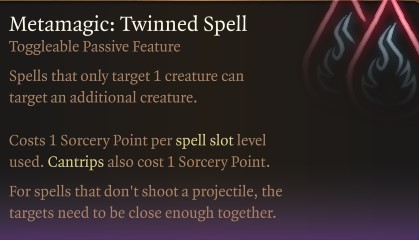
The Sorcerer fills the role of your AOE damage nuker and carries your damage on the Elder Brain fight. You want to use Metamagic Quickend or Twinned on turn one to fire off massive damage spells. Twinned, you can use Chromatic Orb and target two characters, Blight and Disintegration, at higher levels. Quickened lets you use your bonus action to cast another spell. Use Quickened for AOE spells like Fireball or Ice Storm when area damage is needed. The big downside to Sorc is limited spell selection. Therefore, horde your spell scrolls, specifically crowd-control ones, and use them on your Sorc when needing a stun.
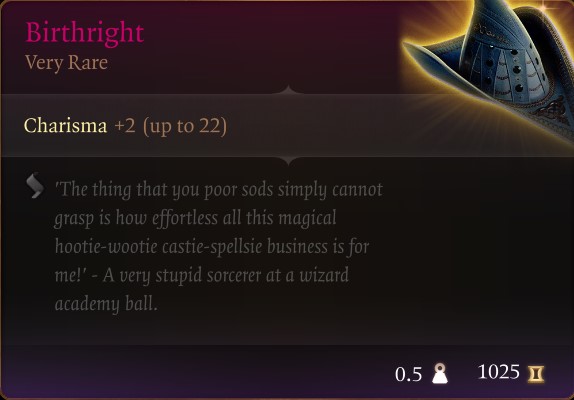
The Sorc can get extremely high Charisma with the Mirror of the Loss bonus and Birthright Hat in Act 3. The Draconic Bloodline passive forgoes the need to use Mage Armour, and with a Shield, you can easily get to 20 AC. If you worry about survivability early, take Shield spell, and Mirror Image and forgo a damage spell. Keep Magic Missile, as it’s imperative to fight with the Hag and Orin later on. Also, take Warlock Magic Initiative to gain Hex and Eldritch Blast combinations. This can be used when some damage is needed, and spell slots are low.
- Suggested Companions: Wyll or Gale
- Alternative classes: Warlock, Wizard
Honour Mode Sorcerer Build Summary
Act 1 Gear
- Chest – The Protecty Sparkswall
- Gloves – Gloves of Cinder and Sizzle
- Boots – Cinder Shoes
- Ring – Ring of Absolute Force
- Weapon – The Spellsparkler
- Off-hand – Adamantine Shield
Act 3 Gear
- Chest – Potent Robe
- Gloves – Quickspell Gloves
- Boots – Boots of Speed
- Necklace – Spellcrux Amulet
- Weapon – Markoheshkir
- Off-Hand – Shield of Devotion
- Range – Darkfire Shortbow
Level Progression
- Level 1 – Chromatic Orb, Magic Missile
- Level 2 – Thunderwave
- Level 3 – Scorching Ray
- Level 4 – +2 Charisma, Misty Step
- Level 5 – Fireball
- Level 6 – Counterspell
- Level 7 – Ice Storm
- Level 8 – Magic Initiate Warlock, Blight
- Level 9 – Banishment
- Level 10 – Hold Monster
- Level 11 – Disintegration
- Level 12 – +2 Charisma
Tactics and Combat Strategies
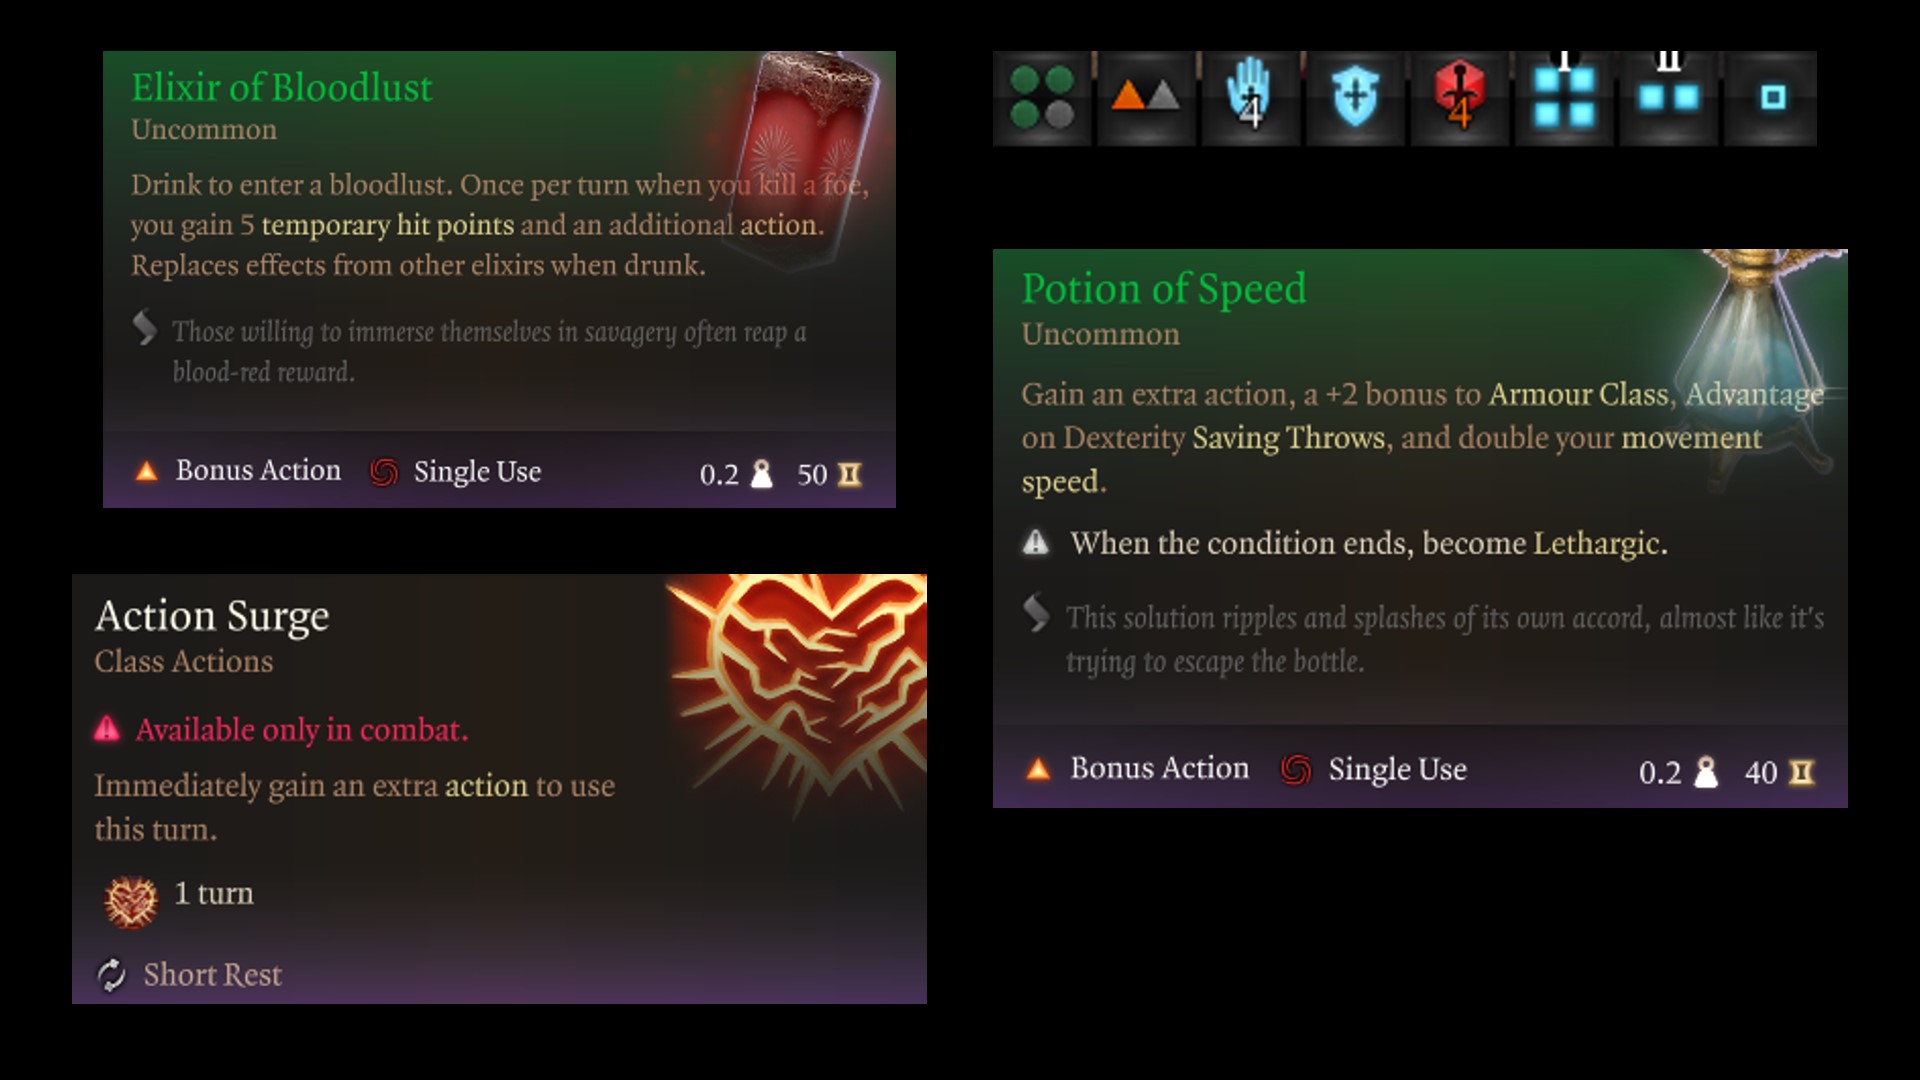
In honour mode, setup your party for the best possible outcome in Baldur’s Gate 3 by taking your time before combat. You need to focus on five key areas for success: turn one, consumables, surprise, pre-buffing, and hirelings. Here’s how each works:
- Hireling – before combat begins, unlock a Hireling with Withers. Select the Druid or Cleric class and level them up. Drop one companion from your party, and add the hireling to your group. Then leave camp and buff all three party members until long rest buffs that do not require concentration. Longstrider, Aid, Heroes’ Feast, Freedom of Movement, Darkvision, Protection from Poison, and Daylight. Return to camp, dismiss, and add a companion back. While a 4-5 minute process, you’ll end up with an insane amount of buffs, health, and added survivability every long rest.
- Pre-Buff – before combat, make sure to buff with oils on weapons, elixirs, bless (10 turns), Mirror image (10 turns). To do this properly, stay outside of combat in stealth, hit enter turn base mode, and buff with your various characters anything that lasts until ten turns. Then, end your turn to refresh action and bonus action. Next, sneak up in bow range for your Ranger and strike a target to trigger a surprise status effect. If done right, you will get one free round of damage!
- Consumables – Bloodlust, Potion of Speed, Elixirs, and Arrows are some of the easiest ways to add power to your builds. Every character should buff with an elixir for challenging fights:
- Ranger – Bloodlust or Viciousness
- Fighter – Hill Giant, Vigilance, or Colossus
- Cleric – Peerless Focus, Vigilance, or Universal Resistance
- Sorcerer – Battlemage’s Power, Viciousness, or Heroism
Top 10 Tips
Here are the best ten tips for completing Honour Mode Campaign in Baldur’s Gate 3 with the best Party Setup:
- Progression: Complete the prologue, unlock companions, and then head to Hollowed City.
- Druid Grove: Interact with everyone, loot everything, and sell items to stock up on potions, arrows, and alchemy materials.
- Unlock Withers: Move to unlock Withers in a nearby Chapel (X:287, Y:332).
- Respec: Reroll companions to optimize their ability scores, classes, and subclasses.
- Best Early Builds: Gloom Stalker Ranger, Battle Master Fighter, and Berserker Barbarian are powerful early on and gain Extra Attack at level 5.
- Reach Level 5: Focus on easy quests while exploring, and avoid bosses and Githyanki fights until reaching level 5 or higher.
- Optimize: Craft Potions of Speed, Drow Poison, Elixirs of Bloodlust, and Hill Giant Strength. Optimize your party composition to include damage, crowd control, and healing.
- Re-Engage Bosses: At levels 5-6, engage in harder fights without the risk of immediate defeat.
- Potion of Invisibility: Stockpile invisibility potions and keep one on each character to prevent a group wipe.
- Loot Everything: Gold is precious early on, so take and sell everything to upgrade gear and increase your collection of consumables.
Permanent Bonuses
Make sure to take the time to collect each important Permanent Bonus throughout each act. Below are our best selections for a Baldur’s Gate 3 honour mode party, regardless of your setup:
| Act 1 | Act 2 | Act 3 |
|---|---|---|
| Auntie Ethel’s Hair: Gain +1 to an Ability Score. | Potion of Everlasting Vigour: Gain +2 Strength. | Mirror of Loss – +2 to an Ability Score of your choice. |
| Awakened: Use illithid powers as a Bonus Action. | Slayer Form: Ability to transform into the Slayer. | Partial Ceremorphosis: Access to tier 3 illithid Powers. |
| Scratch: Gain Find Familiar Scratch. | Summon Us: Allows you to summon Us. | Sweet Stone Features: Blessed permanent. |
| Cheeky Quasit: Gain Summon Quasit Shovel. | Statue of the Gods: +2 to Saving Throws | |
| Loviatar’s Love: 30% Hit Points or less, you gain a +2 bonus to Attack Rolls and Wisdom saving throws. | ||
| Necromancy Of Thay: access to powerful spells in Act 3. | ||
| Volo’s Ersatz Eye: See Invisibility |
Looking For More About Baldur’s Gate 3?
Thank you for reading the Baldur’s Gate 3: Best Honour Mode Party Setup Guide. We provide the latest news and create guides for Baldur’s Gate 3. Also, watch me play games on Twitch or visit my YouTube channel!
 Reddit
 Email
Email
